
Our FlyRods
Where we started the journey.
Each flyrod is hand crafted in house with as few commercially purchased components as possible. I like the fact that when I say its built by me it really is as much as it possibly can be.

The making of a bamboo flyrod has many, many steps and I will outline a few of the main ones for a general idea of the process.
The first step is to give the rod its colour, which is done with a blow tourch and the outside of the culm of bamboo is given a lite char to give the desired tone. This step also removes some of the excess water that is still in the culm, even after many years of drying.
The culm of bamboo is the cut to the desired length that the rod will be +25cm, I usually give even more.
after that the 7cm (2 inch) diametre full culm is split into 24 equal strips and then the nodes of the bamboo are prepped (flattened and straitened) then the full length of each strip is straitened using a heat gun. Bamboo becomes quite pliable once heated a little.
at this point the shaping begins each section of the rod has 6 equilateral triangles laminated together, this gives it its strength. some people will hand plane the strips into a triangle but to save time I have a piece of equipment that will do this for me in a much shorter time period.
the 18 strips that have been chosen to create the rod are bound in 3 groups of 6 and go through another heat treatment process to eliminate even more of the moisture. this is done with a 4 foot long oven that most rod builders have custom made.
while the heat treatment is on the way the planing form is set up to the measurements needed to give the rod the flex and spine desired to cast the desired weight of line.
after the first heat treatment the enamel side of the strip is sanded to take that all off to show the fibers underneath.
at this point many hours of planing the individual strips start. this part of the build usually takes me a full day to plane down each of the 18 strips to their final dimensions. Very hard on the hands. This is the part that I really enjoy as it’s when the rod starts to take its shape.
the rods sections are now ready to be glued together and once again bound.
After its sat for the night while the glue dried it goes for the final heat treatment. The glue is gently sanded off the outside of the rod and each section is checked for glue lines (a minor defect), hair line cracks that were not noticeable until the final sanding (major defect), twists or bends in the blank rod.
The rod lengths are trimmed to the final lengths desired and the ferrules are then fit to the proper ends of each section. The first coating of the varnish is applied, most use a dip tank to apply a even coating to the rod.
At this point most will assemble the hardware onto the rod and it will be finished. I build most of the hardware to the desired specifications of the client. I use goldsmith techniques to create the metal components of the reel seats and turn the reel seats and other components from the types of wood the client has asked for.
the photo above is a partially completed reel seat with sterling silver hardware.
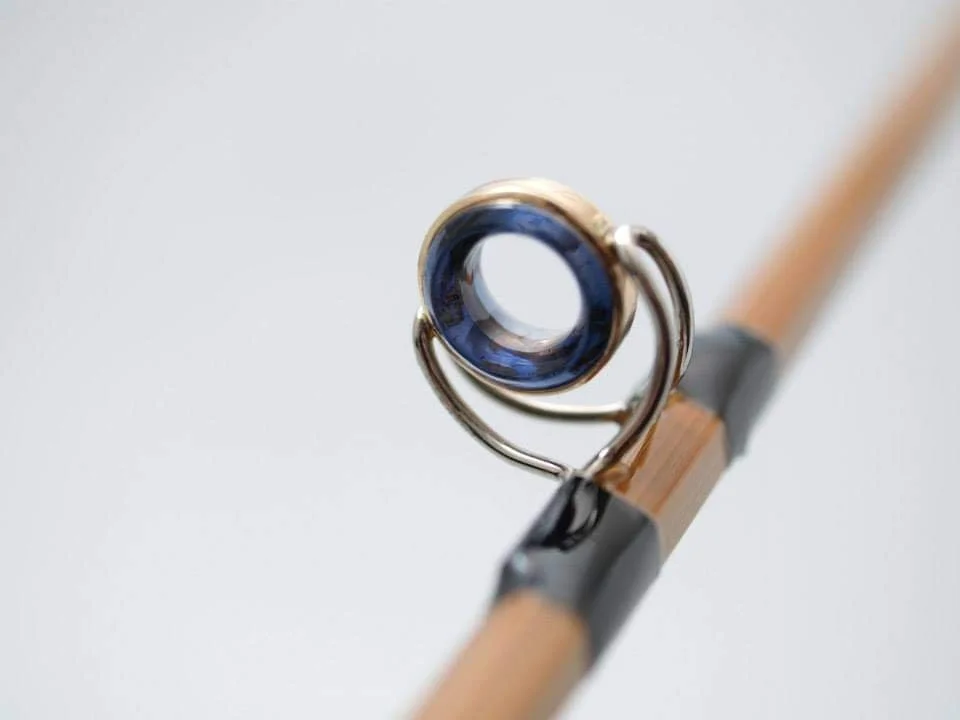
The completed rod. The base of the rod has a piece of Jade set into it and the stripping guide will match the base of the rod. This guide is created in house as well.
This will be shaped into a ring then set into either sterling silver or 14 krt gold at customers request.
these are the last parts to go onto the rod, the guides are attached using the traditional silk thread wrapped very carefully so each thread is tight beside the other and none overlap. A coating of epoxy is applied to the thread wraps but some rod builders will skip this step and the final coating of the varnish will hold the thread in place.
The rod is now finished and ready for delivery, these days I now build the cases the rods are stored in as well, the header photo shows the cases.


